Browsing the Inventory
See Browsing Tables for basic instructions on browsing the inventory.
- discussion of statuses
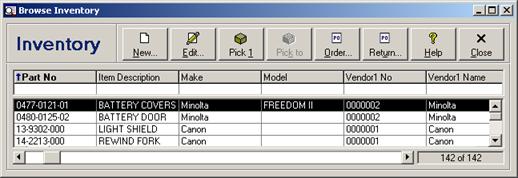
Each browse column is discussed in the following table. Unless otherwise specified, the filter field for searching each column may be any text phrase (see Filtering or Searching Data by Column (Field Filters)).
Inventory - Browse Columns
|
Column |
Description |
|
Location |
The business location ID of the number series range to which this customer account number belongs (see Business Location - Number Ranges Tab). The field filter may be any text phrase, or select one of the business location IDs from the dropdown. This column is available only when multiple business locations have been configured. |
|
Part Number |
|
|
Item Description |
|
|
Make |
-custom caption |
|
Model |
-custom caption |
|
Vendor 1 Number |
-custom caption |
|
Vendor 1 Name |
-custom caption |
|
Vendor 1 Part Number |
-custom caption |
|
Vendor 2 Number |
-custom caption |
|
Vendor 2 Name |
-custom caption |
|
Vendor 2 Part Number |
-custom caption |
|
Vendor 3 Number |
-custom caption |
|
Vendor 3 Name |
-custom caption |
|
Vendor 3 Part Number |
-custom caption |
|
Bin |
-custom caption |
|
Quantity |
|
|
Purchase Price |
|
|
Selling Price |
|
|
Status |
Gray for inactive, green for active, yellow for on order, orange for minimum stock, red for low stock |
Adding a New Inventory Item
To add a new inventory item, click the  button on the toolbar, click the New
button in the browse window, select New Inventory Item from the
File menu or the context menu (see Context
Menus), or press the Shift+Ins key combination. See Adding Records for information on adding records in
browse windows, and Editing Inventory
Items for individual field descriptions.
button on the toolbar, click the New
button in the browse window, select New Inventory Item from the
File menu or the context menu (see Context
Menus), or press the Shift+Ins key combination. See Adding Records for information on adding records in
browse windows, and Editing Inventory
Items for individual field descriptions.
- adding a new inventory item from a vendor
- adding new inventory item from a purchase order
Editing an Inventory Item
To edit an inventory item, select the record in the browse
and then either click the  button on the
toolbar, click the Edit button, select Edit Inventory Item from
the File menu or the context menu (see Context
Menus), or press the Enter key. See Editing Records for further instructions on
editing records in browse windows, and Editing Inventory Items for individual
field descriptions.
button on the
toolbar, click the Edit button, select Edit Inventory Item from
the File menu or the context menu (see Context
Menus), or press the Enter key. See Editing Records for further instructions on
editing records in browse windows, and Editing Inventory Items for individual
field descriptions.
Manually Picking a Part from Inventory
-
Viewing an Inventory Item
To view an inventory item, select the record in the browse
and then either click the  button on the
toolbar, click the View button, select View Inventory Item from
the File menu or the context menu (see Context
Menus), or press the Enter key. See Viewing Records for further instructions on
editing records in browse windows, and Editing Inventory Items for individual
field descriptions.
button on the
toolbar, click the View button, select View Inventory Item from
the File menu or the context menu (see Context
Menus), or press the Enter key. See Viewing Records for further instructions on
editing records in browse windows, and Editing Inventory Items for individual
field descriptions.
Deleting an Inventory Item
To delete an inventory item, select the record in the
browse and then either click the  button
on the toolbar, select Delete Inventory Item from the File menu or
the context menu (see Context Menus), or press
the Shift+Del key combination. See Deleting
Records for further instructions on deleting records in browse windows.
button
on the toolbar, select Delete Inventory Item from the File menu or
the context menu (see Context Menus), or press
the Shift+Del key combination. See Deleting
Records for further instructions on deleting records in browse windows.
Inventory Group Filters
A number of preprogrammed group filters allow for quick selection of specific inventory item record sets. See Group for basic instructions on using group filters. The following table lists the various inventory group filters.
Inventory Group Filters
|
Filter Name |
Condition |
|
All Locations |
Includes all inventory records. |
|
Shared Inventory Only |
Includes inventory records for the shared inventory store. |
|
Current Location Only |
Includes inventory records for the inventory store of the business location of the currently logged in user (see Business Locations). |
|
Current Location and Shared Inventory Only |
Includes inventory records for the inventory store of the business location of the currently logged in user (see Business Locations), and the shared inventory store. |
|
All Inventory Items |
Includes all inventory item records. |
|
Active Inventory Items |
Includes inventory item records where the inventory quantity is non-zero, the minimum required quantity is non-zero, or the item is on order. |
|
Inactive Inventory Items |
Includes inventory item records where the inventory quantity is zero, the minimum required quantity is zero, and the item is not on order. |
 Editing Inventory Items