Printing a Report
After selecting a report (see Selecting a Report) and then selecting the Destination tab, select the Printer tab to send the report to a printer.
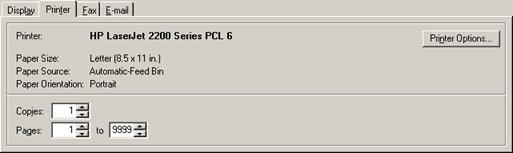
Click the Print button to send the report to the specified printer, or click the Close button to close the reports window without printing. You may optionally specify the number of copies to print, and a page range to print. The default printer for reports may be specified from Module Options (see module option “Default Reports Printer” under General Module Options).
Click the Printer Options button to open the Print Setup window and select a different printer, or to modify default printer settings such as the paper size, paper source, or paper orientation.

From the Print Setup window, you may also click the Properties button to set additional printer properties that are unique to the selected printer (e.g. duplex printing).
NOTE Printer settings configured by clicking the Properties button might not be retained permanently by Windows. To retain the settings permanently, they may need to be configured using the Windows printer driver settings in the Windows control panel. Please see the manufacturer’s instructions for information on which settings are available for your printer and how to configure them. At Your Service Software, Inc. is unable to provide technical support for specific models of printers.
NOTE If working with a MySQL database then the name of the database must be configured in the MySQL Connector/ODBC system DSN in order for printing of reports to work correctly (see Installing MySQL).
(See also Printing a Form, and Printing a Label.)
 Faxing a Report